


Diastometer™
Diastometer™
Couldn't load pickup availability

- Product Description
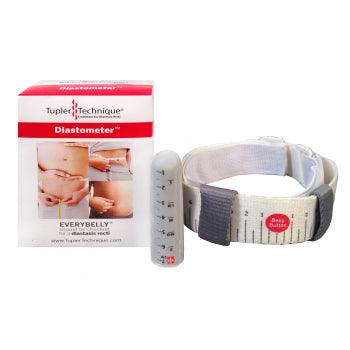
The purpose of the Diastometer™ is to provide a standardized method of measurement for checking diastasis recti in centimeters. You can use it to check yourself or be checked by a professional. The Diastometer™ has two parts to it. The “belt” to check the distance of the separated muscles and the “finger cot” to measure the condition of the connective tissue.
Instructions for putting on the Diastometer™ belt. If you are checking yourself, then put the belt on so the word belly button and the numbers are facing you so you can read them. If you are checking someone else, then the word belly button and the numbers should be facing you, not the person being measured.
Put the belt on with the word belly button over your belly button and velcro in the back. The loop piece of velcro stretches to accommodate various sizes. The hook piece can be cut or folded in half to fit you. Do not put it on too tight, you will want to be able to move the belt closer to the area where you are checking.
Locations of measurements: You measure both the distance(Diastometer™ belt) between the separated muscles and the condition(finger cot) of the connective tissue in three places:
- At the belly button
- Above the belly button halfway between the bottom of the sternum and the belly button
- Below the belly button halfway between the pubic bone and the belly button
When to measure a diastasis. It is important to measure the diastasis when it is the largest.
The largest would be in a back lying position at rest. This is difficult to do because it is hard to feel the inner ridges of the muscles without them moving. So when checking for a diastasis,it’simportant to feel the movement of the muscles. To obtain the most accurate measurement, you will want to check the measurement when the muscles first start to move. To feel the movement of the muscles, you may have to have the client come up and down a few times before you get the reading.
Causes of inaccurate reading.There are two things that can affect the accuracy of the diastasis measurement. It is therefore important to remember these two things when checking for a diastasis:
- Relax your muscles before lifting your head. If you engage your transverse muscle it will make the measurement appear smaller.
- Do not come up too high when lifting your head. The higher you come up the closer the muscles will come together.
Checking a diastasis with the Diastometer™ belt.
- Wearing your Diastometer™ belt, get in a backlying position with your knees bent. You can check on a bed or on the floor. If you are checking your own diastasis the numbers should be facing you so you can read it. If you are checking someone, you will want the numbers facing you so you can read them.
- Relax your abdominal muscles and bring your head up. If you see a half football like bulge you will know you have a large diastasis and need two hands when checking for the inner muscle ridge on each side of the belly button. If you have a protruding belly button, this is also a sign of a large diastasis. Checking a large diastasis is different from checking a small diastasis.
- Checking a large diastasis. With a large diastasis, you will need to check each side separately. To check the right side, your pinky finger on your left hand goes in belly button and right hand is lined up right next to it. This hand position is if you are checking yourself. If someone else is checking you, it is the right hand instead of the left. Relax your muscles and bring up your head. Now go up and down a couple of times so you can feel the movement of the inner ridge of the muscle on the right side with your pinky finger on your right hand. Once you have felt the movement of the muscle you can then check the position when the muscle first starts to move. Keep your right hand on your belly and with your left hand move the gray ring on the Diastometer™ belt to where your pinky finger is on your right hand. This is then the measurement on the right side. If you are checking it yourself lift up the top of the belt so you can see what number the gray ring is on. Now do the other side the same way. Only this time it will be the pinky finger on your left hand getting the location and your right hand is moving the gray ring to that location if you are checking yourself and the opposite if someone is checking you. Add the numbers from the two sides together and you have the size of your diastasis in centimeters. Measure in the three places described in locations of measurements. Now record the numbers in your Tupler Technique® Guidebook. Please also watch the video on this page.
- Checking a small diastasis. With a smaller diastasis you will be able to check the distance between the muscles with one hand. Fingers pointing down (not sideways) relax your abdominal muscle and lift your head. Come up and down a couple of times until you feel the movement of the muscles on each side of your hand. Then come up and take the reading when the muscles first start to move. If you are using your right hand to check yourself, then use you left hand to move the gray sliders. One by the thumb and one by the pinky finger. The look to see what the centimeters are on each side of the red belly button. Add the two numbers together from each side and you have the size of your diastasis in centimeters. Measure in the three places described in locations of measurements. Now record the numbers in your Tupler Technique® Guidebook. Please also watch the video on this page.
Checking a diastasis with the Diastometer™ finger cot.
- The purpose of the Diastometer™ finger cot is to measure the condition of the connective tissue. The deeper your finger goes, it is an indication of weak connective tissue. Weak connective tissue takes longer to heal. The goal in closing a diastasis is having shallow connective tissue.
- The condition of the connective tissue, like the distance, is measured in the same three places.
- Put the Diastometer™ finger cot on your index finger with the numbers facing you so you can read them when you are checking.
- Once again, relax the muscles.
- Put your finger in your belly button. You do not need to push it down.
- Now see where the skin lines up with the Diastometer™ and this is your reading.You can measure it in centimeters. You will see the correlation between centimeters and the depth of the connective tissue. Your connective tissue can be shallow, shallow/medium, medium, medium/deep, and deep. Now measure above and below the belly button as described in location of measurements and as shown on the video.
- Now record the numbers in your Tupler Technique® Guidebook. Please also watch the video on this page.